
My latest project combined three of my favorite things: thrifting, painting, and the color turquoise. I found the perfect set of coffee/end tables at the thrift store.

Ugly, dark, water stained...what's not to love?
I decided to use chalk paint (not chalkboard paint, those are two different animals) because it would give me the finish I wanted. Andplusalso it requires no sanding or priming. I also decided to make my own chalk paint because a.) it would let me use literally any color I wanted (Brands like Annie Sloan have limited colors) and b.) it's cheaper. (Annie Sloan is expensive.) You say "cheap", I prefer the term "thrifty."
After scouring the internet for DIY chalk paint recipes, I decided to use plaster of Paris. (You can also use calcium carbonate or unsanded grout.) The hardest part (no really, it was agonizing) was choosing the perfect paint color. Everything was either too blue or too green.
Finally, after my third trip to Lowes and poring over umpteen paint samples, I wandered over into a different section and my eyes lit on the perfect color.

Olympic aqua chiffon. It was like the heavens opened up and a glorious light shone down upon it. Or maybe it was just the florescent lighting. Tomato, tomahto.
Again, the appeal of this type of paint is that it requires virtually no prep work. No sanding or priming. (Full disclosure: the paint that I used was paint and primer in one.) I wiped down the tables with a damp cloth and a bit of dishsoap and mixed my paint while they dried. I used a 3:1:1 ratio (3 parts paint, 1 part each plaster of Paris and water) It's VERY IMPORTANT to mix the PoP and water together first before adding it to the paint. Make sure you stir it well to eliminate any lumps. I used 1 1/2 cups of paint and 1/2 cup each of plaster and water.
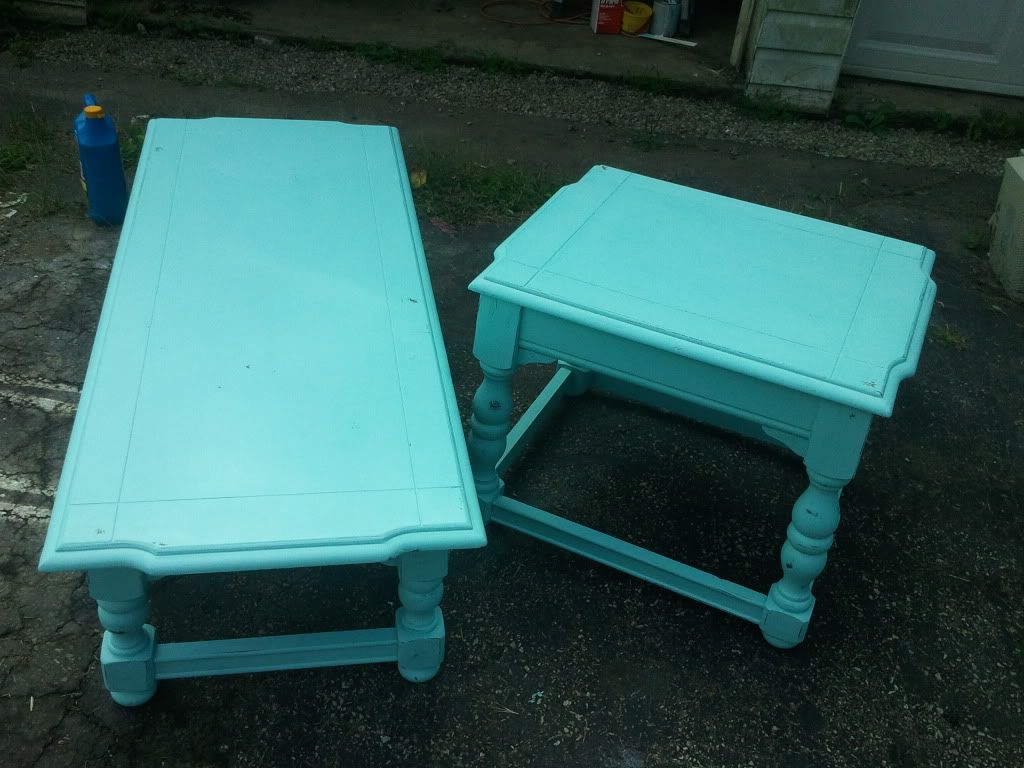
A little bit of chalk paint goes a long way; I was able to do 2 coats of paint on all three tables with what I mixed. I let them dry overnight and distressed the edges and spots on the legs with some 80 grit sandpaper and voila:


The final step was to finish it off with some clear furniture wax. I used Johnson's paste wax. A word to the wise: make sure you do this step outside because this stuff reeks. I'll have to see how they hold up in the high traffic area of a living room to gauge whether or not I need to coat it with a heavy duty sealant instead. But for now, they're done and I love them. I'm so excited to decorate my new living room, all my milk glass will look amazing against the turquoise . I also want to add some pops of apple green as an accent color (even though I hate the term "pop of color") and maybe a hint of pink.
So that's my latest project, hopefully the next post will be sooner than 6 months.
No comments:
Post a Comment